Thursday, September 4, 2008

2001-2005 Honda Civic dash disassembly

The Civic can be a very tricky vehicle for a new head unit installation. It's a combination of hidden screws, very tight pressure clips, and a dash surface that can be damaged if you look at it wrong. Here's how to take the dash apart on this car.

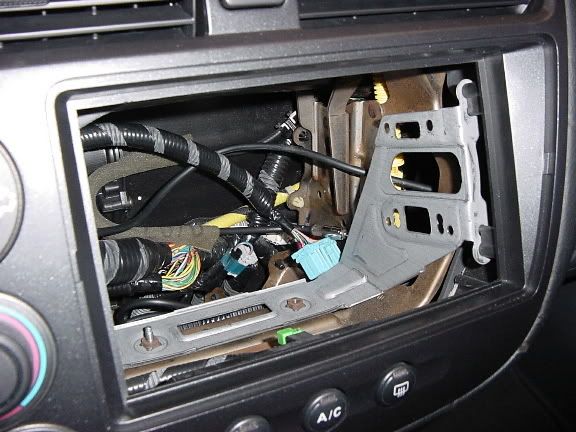
In the pictures below, the factory radio and pocket have already been removed. I'd like to say that it's so that you can have a clearer look at the dash structure behind the radio; but it's really because I took these pictures while working on a car that had a CD player stolen.

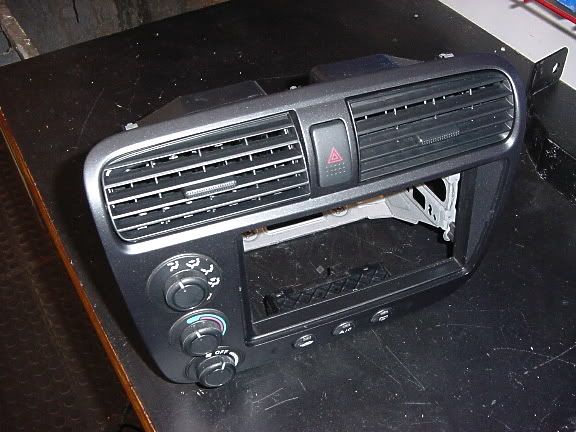
The first picture is the dash and radio bezel, still installed in the vehicle. To install a new radio, this entire panel--including the vents, climate control modules, and metal side brackets--will need to be removed.

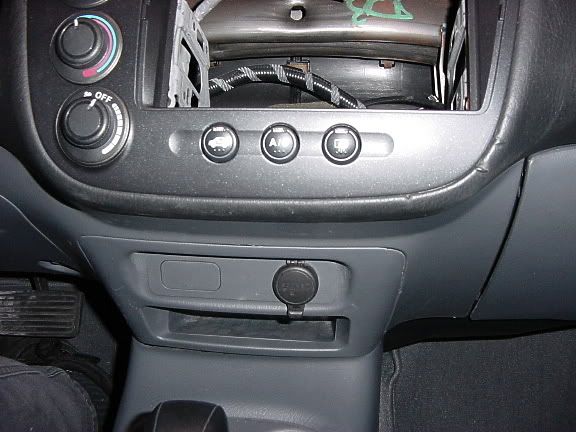
Look closely at the vinyl that surrounds the outside edge of the dash panel. In several locations you can see marks where someone tried to pry off the panel from the front. This is a very common error. You cannot use a tool to pry the panel off; and you cannot remove it at all until you've take out the hidden screws.


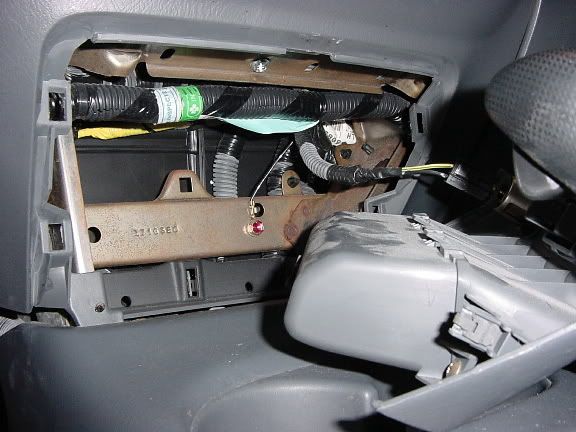
Here's a closer look inside the dash. The silver-colored bracket is attached to the front panel, and needs to be removed with it. It's secured with two screws, driven through the bottom of the bracket from underneath. If you look closely at the lower part of the bracket, you'll see one of the screws still in place, and another location where the screw has been removed.


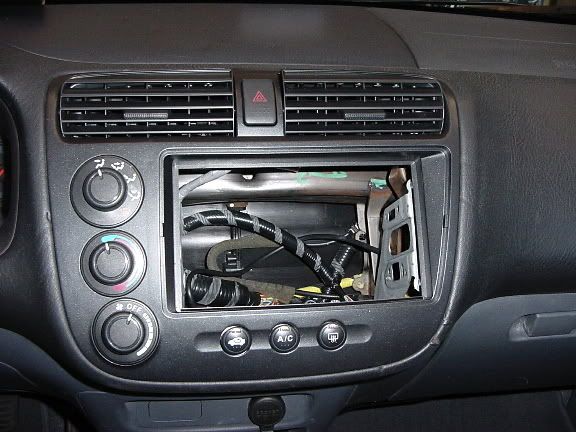
In order to get to the screws, you need to remove the small access panel underneath. This panel has the cigarette lighter built into it, and it's just held in with clips. Pry it away until it pops off. A plastic "trim stick" is a handy tool for this step, because it won't leave marks on the soft plastic of the dash.


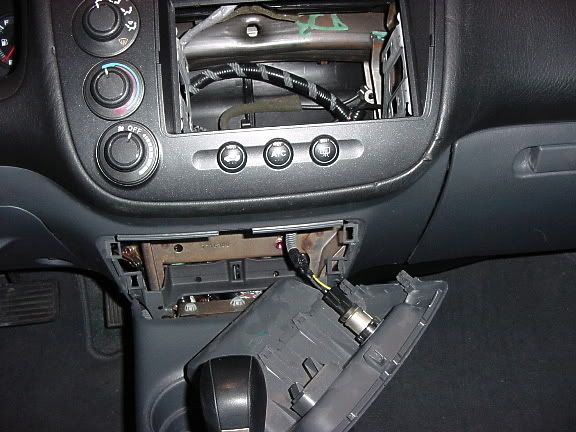
A shot of the cavity with the access panel removed. You can see the silver-colored screw at the top of the opening. This screw, and another like it, must be removed before the upper dash plate assembly will come out.


Once the screws are out, you need to reach up through the small access panel, and try to push the dash assembly out from the rear. This is not necessarily going to be an easy step! It's also easy to cut your hands on the sharp metal behind the dash, so gloves are recommended. It takes quite a bit of force to get the panel clips to release. Pushing from behind is the only way to avoid damaging the front vinyl. Once you have a few clips out, there should be enough of a gap in the front that you'll be able to exert some leverage there too. The first few clips are the hardest.


There will be several different plugs you'll need to detach before you can remove the complete assembly. Take note of how the wires bundles are routed around the brackets, so that you'll have an easy time plugging them back again when you're ready to re-assemble the dash.

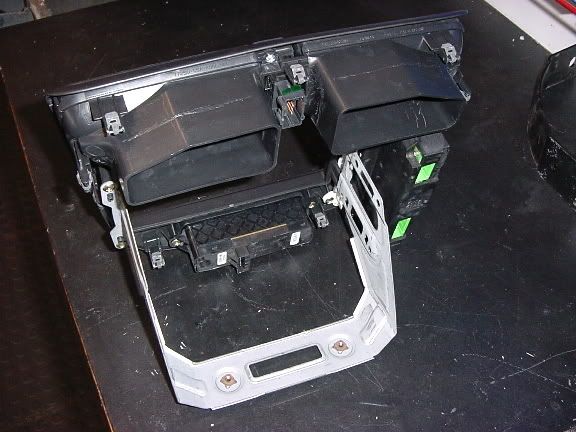
Here's a shot of the removed dash panel:


Wednesday, August 20, 2008

Testing vehicle fuses with a multimeter

If you're trying to find a blown fuse in your vehicle, a multimeter can make the job much easier.

Standard automotive "blade" type fuses all have test points at the top. This allows you to test a fuse without removing it from the fuse box.


To test for a blown fuse, set your multimeter for "DC volts". Turn the vehicle's key to the "run" position (don't start the engine). If you're looking for a blown lighting fuse, turn the light switch on.

Connect the multimeter's black probe to a ground point. This can be the negative battery terminal or a metal bolt if you're testing fuses under the hood; or a metal brace under the dash. A seat bolt will usually work too.

With the red probe, touch each test point at the top of each fuse. You should get a DC voltage reading on each fuse that you test. A good fuse will show DC volts on both test points. If you find a fuse with a volt reading on one test point, but no voltage on the other, then you've found a blown fuse.


Don't forget to look for fuses under the hood. The fuse being tested in the picture below is the main cabin lighting/clock fuse. These fuses sometimes also supply the "memory" constant power wire for the factory radio, so it's a fuse often blown during head unit installations.


Don't try to test for blown fuses with the "continuity" function on your multimeter. A continuity test works by sending voltage from the meter through the circuit. When the circuit has voltage present already, from the vehicle battery, continuity testing becomes unreliable. You can damage your meter by using continuity testing on a live circuit.

If you don't own a digital multimeter, buy one! These are a must-have tool for car audio troubleshooting. You don't need an expensive meter; a $20 discount store multimeter will work well for voltage testing.

Thursday, August 14, 2008

Retained Accessory Power source in a 2005 Malibu

It's often useful to find a key-switched power source in a vehicle, but this is becoming a challenge in the newer GMs. Here's a convenient spot to find accessory power in a 2005 Chevy Malibu. This may also work for a Chevrolet Cobalt or Pontiac G6. In this illustration, I needed an accessory power source for a satellite radio. "Retained Accessory Power" means that the unit will stay on after the key is switched off, until the driver opens a door. Since the factory radio already does this, it's nice if a satellite radio add-on works the same way.


The fuse position pointed out above is labeled "no connection" in the fuse diagram. (This fuse box is located on the passenger side of the center console). The fuse location has a supply terminal, but no output terminal. I'm going to insert my own fuse, with a fuse tap on the opposite leg from the supply terminal. That means that my added circuit will be protected by my fuse.


Another possible use for this power source is a remote turn-on wire for an after-market amplifier, when you're keeping the factory radio. It's important that you tap the fuse on the opposite leg as the supply terminal (the bottom leg, in this case, is the supply). If you put your fuse tap on the same leg as the supply, your new circuit won't be fuse-protected, and you'll risk serious damage to the vehicle if your circuit gets shorted.

I'd suggest using this only for circuits requiring 5 amps or less. That's enough for the accessory power input for most after-market decks.