Wednesday, August 20, 2008

Testing vehicle fuses with a multimeter

If you're trying to find a blown fuse in your vehicle, a multimeter can make the job much easier.

Standard automotive "blade" type fuses all have test points at the top. This allows you to test a fuse without removing it from the fuse box.


To test for a blown fuse, set your multimeter for "DC volts". Turn the vehicle's key to the "run" position (don't start the engine). If you're looking for a blown lighting fuse, turn the light switch on.

Connect the multimeter's black probe to a ground point. This can be the negative battery terminal or a metal bolt if you're testing fuses under the hood; or a metal brace under the dash. A seat bolt will usually work too.

With the red probe, touch each test point at the top of each fuse. You should get a DC voltage reading on each fuse that you test. A good fuse will show DC volts on both test points. If you find a fuse with a volt reading on one test point, but no voltage on the other, then you've found a blown fuse.


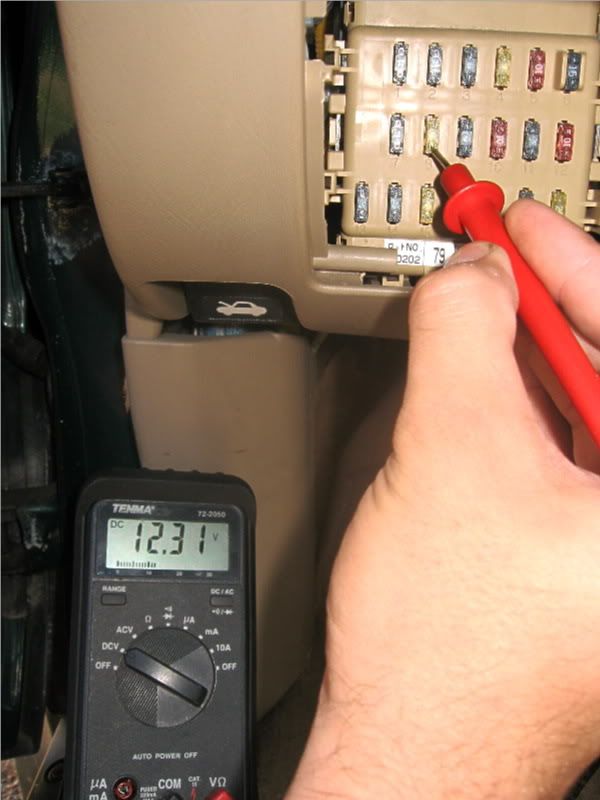
Don't forget to look for fuses under the hood. The fuse being tested in the picture below is the main cabin lighting/clock fuse. These fuses sometimes also supply the "memory" constant power wire for the factory radio, so it's a fuse often blown during head unit installations.


Don't try to test for blown fuses with the "continuity" function on your multimeter. A continuity test works by sending voltage from the meter through the circuit. When the circuit has voltage present already, from the vehicle battery, continuity testing becomes unreliable. You can damage your meter by using continuity testing on a live circuit.

If you don't own a digital multimeter, buy one! These are a must-have tool for car audio troubleshooting. You don't need an expensive meter; a $20 discount store multimeter will work well for voltage testing.

Thursday, August 14, 2008

Retained Accessory Power source in a 2005 Malibu

It's often useful to find a key-switched power source in a vehicle, but this is becoming a challenge in the newer GMs. Here's a convenient spot to find accessory power in a 2005 Chevy Malibu. This may also work for a Chevrolet Cobalt or Pontiac G6. In this illustration, I needed an accessory power source for a satellite radio. "Retained Accessory Power" means that the unit will stay on after the key is switched off, until the driver opens a door. Since the factory radio already does this, it's nice if a satellite radio add-on works the same way.


The fuse position pointed out above is labeled "no connection" in the fuse diagram. (This fuse box is located on the passenger side of the center console). The fuse location has a supply terminal, but no output terminal. I'm going to insert my own fuse, with a fuse tap on the opposite leg from the supply terminal. That means that my added circuit will be protected by my fuse.


Another possible use for this power source is a remote turn-on wire for an after-market amplifier, when you're keeping the factory radio. It's important that you tap the fuse on the opposite leg as the supply terminal (the bottom leg, in this case, is the supply). If you put your fuse tap on the same leg as the supply, your new circuit won't be fuse-protected, and you'll risk serious damage to the vehicle if your circuit gets shorted.

I'd suggest using this only for circuits requiring 5 amps or less. That's enough for the accessory power input for most after-market decks.